> ## Documentation Index
> Fetch the complete documentation index at: https://docs.kleep.ai/llms.txt
> Use this file to discover all available pages before exploring further.
# Instalacja
> Importuj kartridże, przypisz je do swojej witryny i importuj metadane
## Importowanie kartridży
1. Pobierz kod źródłowy kartridża.
2. Wyodrębnij katalog i przenieś folder **link\_kleep** na tym samym poziomie co SFRA.
3. Możesz usunąć projekt SFRA z konektora Kleep (folder `storefront-reference-architecture`) — jest używany tylko do testów.
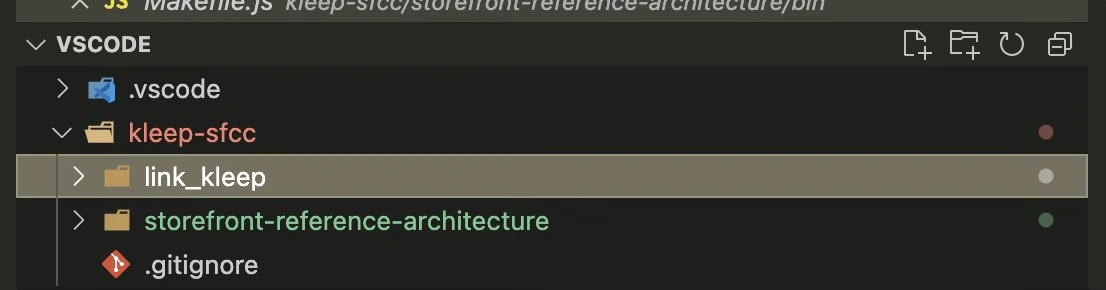 Taka powinna być wyrenderowana struktura kartridży:
 4. Zainstaluj zależności:
```bash theme={null}
cd /path/to/link_kleep
npm install
```
5. Skompiluj frontend:
```bash theme={null}
npm run compile
```
6. Utwórz plik `dw.json` w tym samym katalogu:
```json theme={null}
{
"hostname": "...",
"username": "...",
"password": "...",
"version": "..."
}
```
* **hostname** — Twoje środowisko sandbox, np. `zzaa-001.sandbox.us01.dx.commercecloud.salesforce.com`
* **username / password** — dane uwierzytelniające Twojego account managera
* **version** — aktywna wersja kodu w **Administration > Code Deployment**, np. `version1`
7. Prześlij kartridże:
```bash theme={null}
npm run uploadCartridges
```
8. Przejdź do **Administration > Development Setup > Folder Browser > Cartridges** i zweryfikuj przesłanie.
## Przypisywanie kartridży do witryny
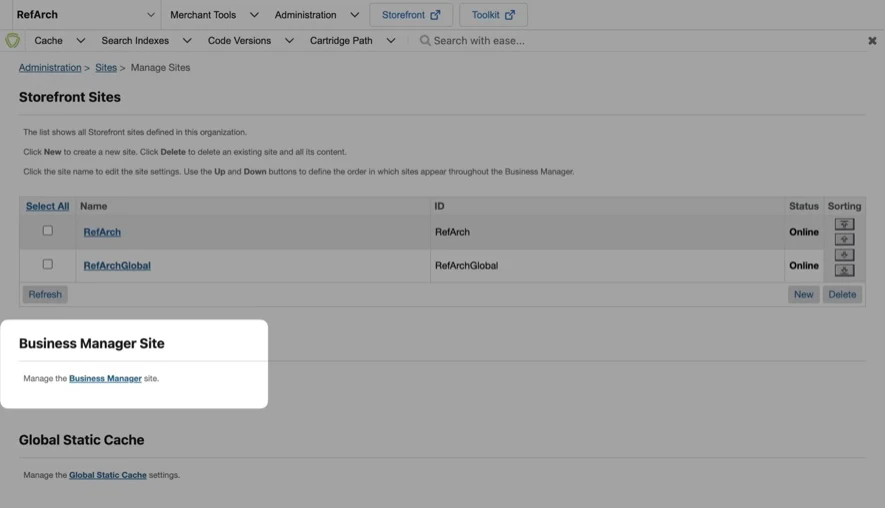
1. Przejdź do **Administration > Sites > Manage Sites**. Wybierz swoją witrynę z listy **Storefront Sites**:
4. Zainstaluj zależności:
```bash theme={null}
cd /path/to/link_kleep
npm install
```
5. Skompiluj frontend:
```bash theme={null}
npm run compile
```
6. Utwórz plik `dw.json` w tym samym katalogu:
```json theme={null}
{
"hostname": "...",
"username": "...",
"password": "...",
"version": "..."
}
```
* **hostname** — Twoje środowisko sandbox, np. `zzaa-001.sandbox.us01.dx.commercecloud.salesforce.com`
* **username / password** — dane uwierzytelniające Twojego account managera
* **version** — aktywna wersja kodu w **Administration > Code Deployment**, np. `version1`
7. Prześlij kartridże:
```bash theme={null}
npm run uploadCartridges
```
8. Przejdź do **Administration > Development Setup > Folder Browser > Cartridges** i zweryfikuj przesłanie.
## Przypisywanie kartridży do witryny
1. Przejdź do **Administration > Sites > Manage Sites**. Wybierz swoją witrynę z listy **Storefront Sites**:
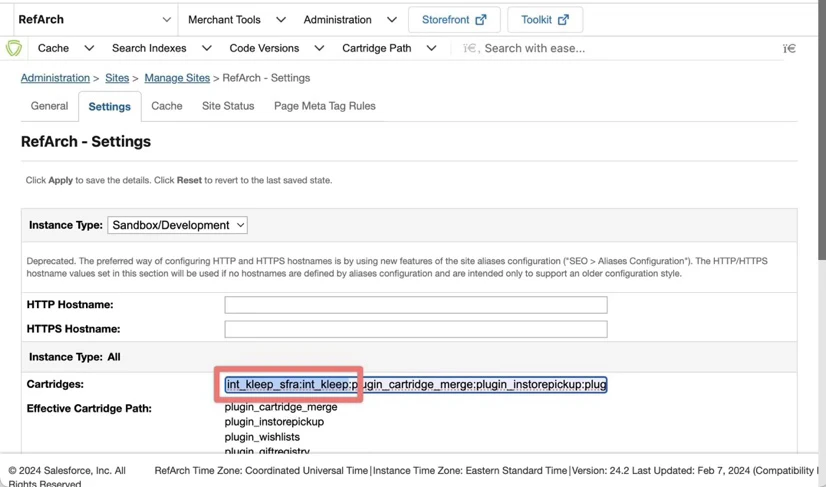
 2. Wybierz zakładkę **Settings**. Na początku ścieżki kartridża dodaj: `int_kleep_sfra:int_kleep`
 3. Przejdź do **Administration > Sites > Manage Sites** i kliknij link w sekcji **Manage the Business Manager site**.
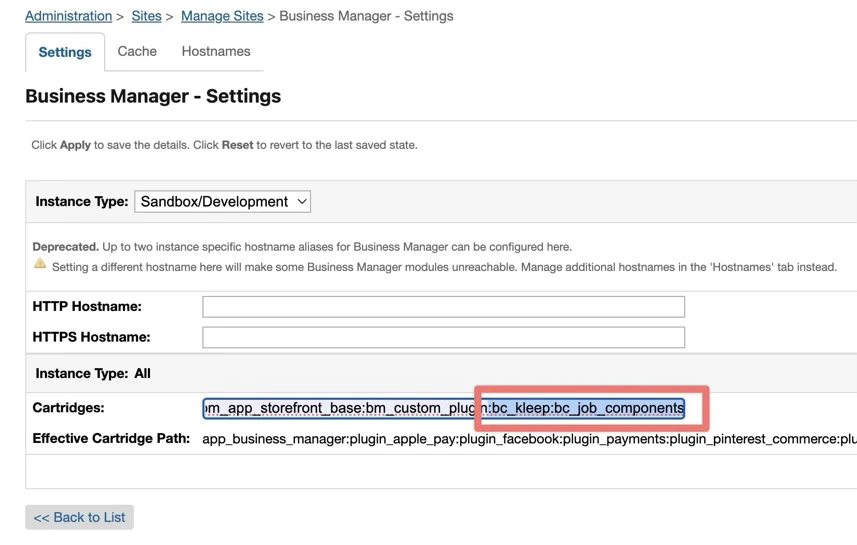
 4. Wpisz `bc_kleep:int_kleep` w polu tekstowym Cartridges (oddzielone `:` przy użyciu wielu kartridży):
 ## Importowanie metadanych
1. Przejdź do **Administration > Site Development > Site Import & Export**.
2. Prześlij `kleep-metadata.zip` zawierające folder metadanych.
## Importowanie metadanych
1. Przejdź do **Administration > Site Development > Site Import & Export**.
2. Prześlij `kleep-metadata.zip` zawierające folder metadanych.
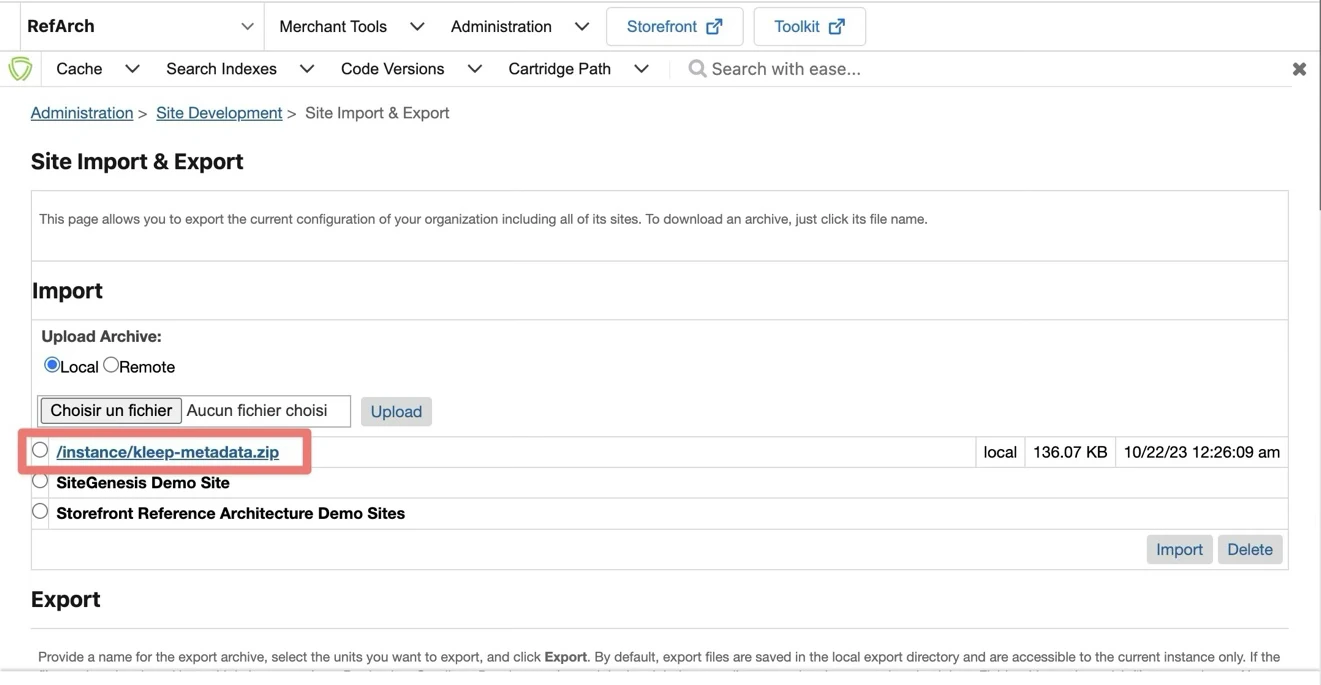 3. Wybierz `kleep-metadata.zip` i zakończ import.